Load Balancing with Nginx and Docker
Load Balancing a Golang API with Nginx and Docker
Introduction
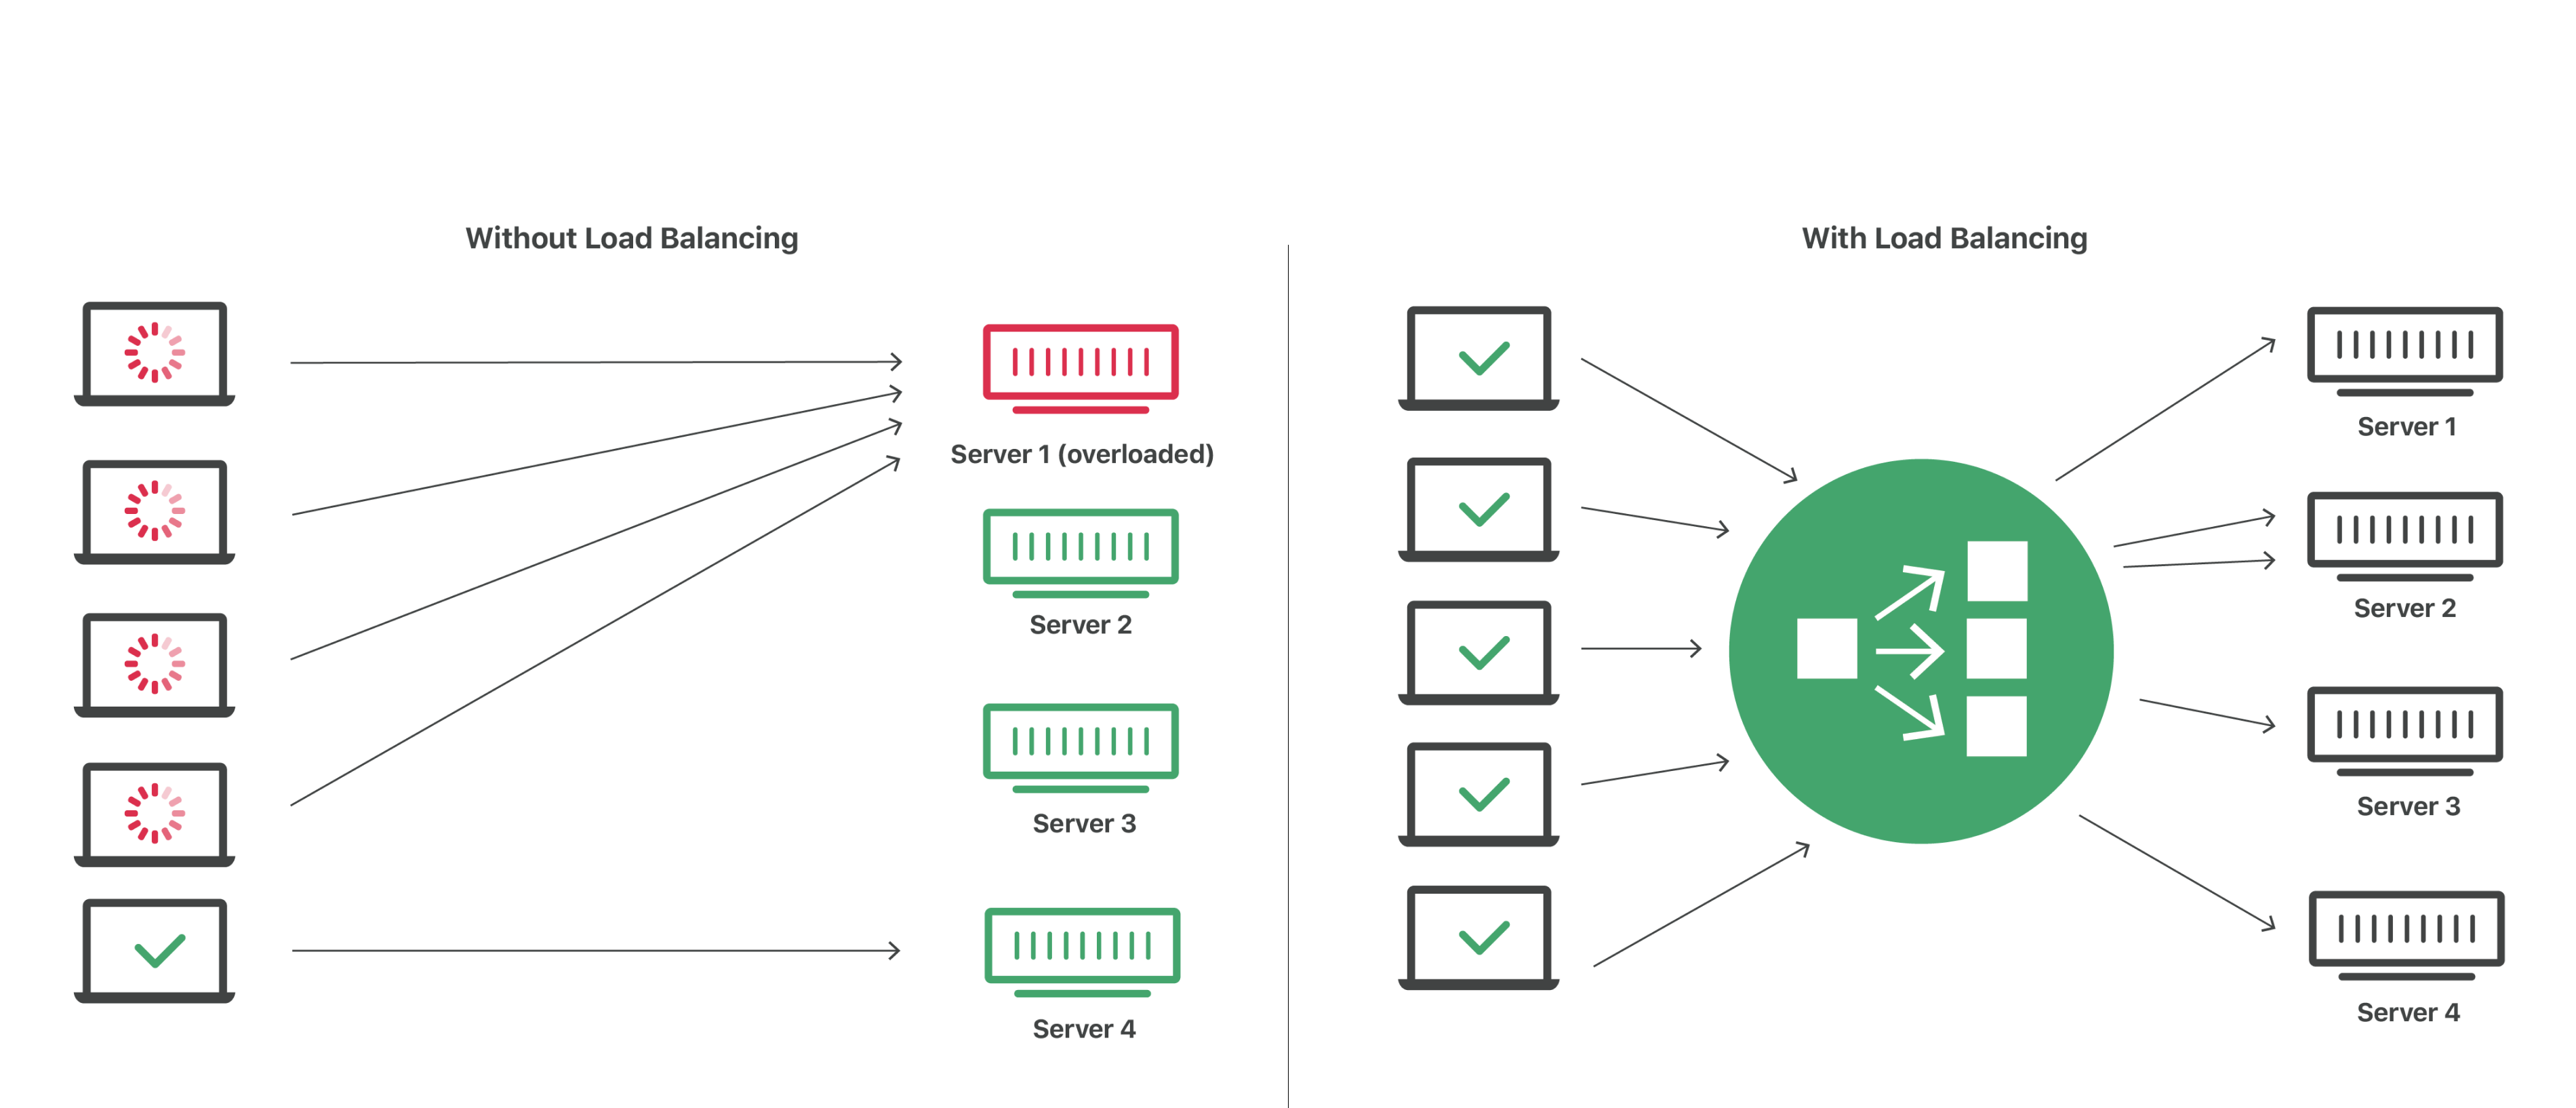
Load Balancing in Software Engineering is the process of distributing network traffic across multiple backend servers to prevent a single server from being overloaded. Service availability and response time are greatly improved by spreading the work across multiple servers Here's an illustration by Cloudflare explaining how load balancing works.

If you need more information on load balancing, Cloudflare's full article on load balancing is a good place to start.
In this article, we will be implementing load balancing on a Go REST API using Nginx, an open source software for Web Serving, Reverse Proxying, Load Balancing, Caching, Streaming, etc., and Docker, a platform that simplifies the process of building, running, managing and deploying applications by packaging them into virtual operating systems called containers.
Let's get into it!
Prerequisites
- Docker
- Docker Compose
- Go
Visit Docker or Go for instructions on how to set them up.
I will be using an existing Go sample application, you can clone the code from my Github repository or create your API.
Todo
- Dockerize the API
- Docker Compose
- Load Balancing with Nginx
Step 1: Dockerize the API
In the root folder of your app, create a file with the name dockerfile and add the following code to it:
# Base image
FROM golang:1.14-alpine AS build

# Runs updates and installs git
RUN apk update && apk upgrade && \
    apk add --no-cache git

# Switches working directory to /tmp/app as the
WORKDIR /tmp/app

COPY go.mod .
COPY go.sum .
RUN go mod download

COPY . .

# Builds the current project to a binary file called api
# The location of the binary file is /tmp/app/out/api
RUN go build -o ./out/api .

#-------------------------------------------------------------

# The project has been successfully built and we will use a
# lightweight alpine image to run the server
FROM alpine:latest

# Adds CA Certificates to the image
RUN apk add ca-certificates

# Copies the binary file from the BUILD container to /app folder
COPY --from=build /tmp/app/out/api /app/api

# Switches working directory to /app
WORKDIR "/app"

# Exposes the port from the container
EXPOSE 8082

# Runs the binary once the container starts
CMD ["./api"]
Open the root directory of your project in your terminal and run the command below to build the docker image for your application.
docker build -t go-api .
The '.' at the end refers to the current directory.
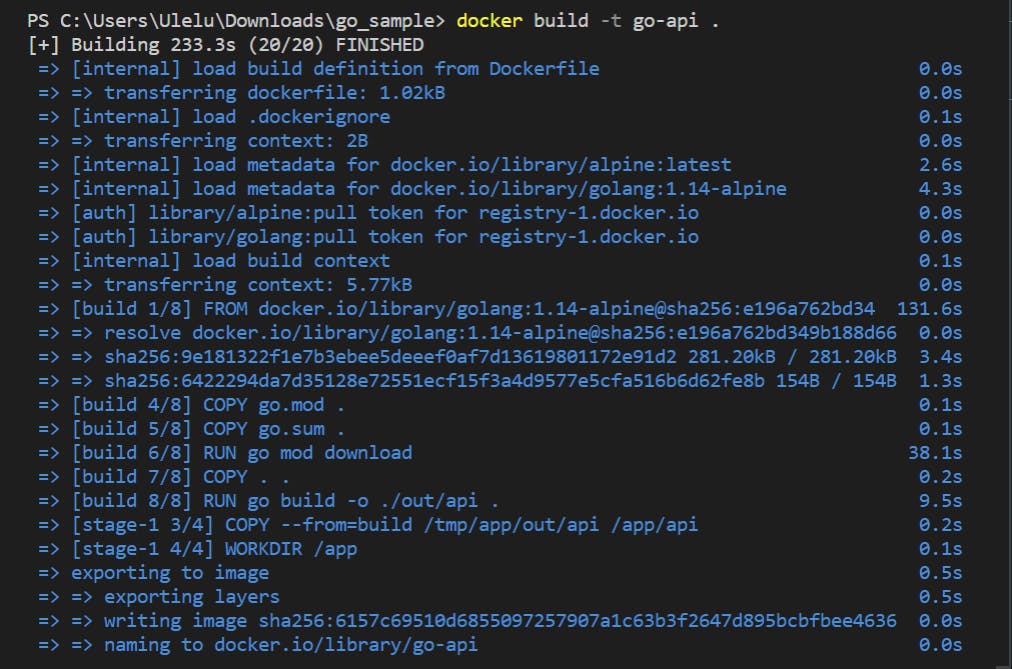
The result on your terminal should look similar to the below:

Verify that the image has been created by running docker images on your terminal. You should find an image with the name "go-api" on the list.
Run the following command in your terminal to get the container up and running:
docker run --name api --rm -p 8082:8082 go-api
Step 2: Docker Compose
As we know, Docker Compose is used to manage multi-container applications. We will be leveraging that to create multiple replicas of our API.
Create a file named docker-compose.yml in the root folder of your project. Update it with the following:
version: '3.3'

#services describe the containers that will start
services:
    # api is the container name for our Go API
    api:
        # It will look for a dockerfile in the project root and build it
        build: "."
        # Exposes the port from a container and binds it to a random port
        ports:
            - "8082"
        # always restart if the container goes down
        restart: "always"
        # Connects the API to a common api.network bridge
        networks:
            - "api.network"
        # Starts up replicas of the same image
        deploy:
            replicas: 5
    # nginx container
    nginx:
        # specifies the latest nginx image
        image: nginx:latest
        # Connects the conf file of the container to the conf file in our folder
        volumes:
            - ./nginx.conf:/etc/nginx/nginx.conf:ro
        # start up the nginx only when all api containers have started
        depends_on:
            - api
        # Connects the port 80 of the nginx container to localhost:8082
        # Port 8082 from your browser now hits the nginx container
        ports:
            - "8082:80"
        networks:
            - "api.network"
networks:
    api.network:
Step 3: Load Balancing With Nginx
Create a file named nginx.conf in the root folder of your project and update it with the following:
events {
    worker_connections   1000;
}
http {
    server {
        # listens for requests coming on port
        listen 80;
        access_log  off;
        # / means all the requests have to be forwarded to api service
        location / {
        # resolves the IP of api using Docker internal DNS
        proxy_pass http://api:8082;
        }
    }
}
Build and Test
Run the following command in your terminal:
docker-compose --compatibility up --build
This will spin up 5 replicas of your application and set up an Nginx container to balance the loads among all containers.
Head over to your browser and enter http://localhost:8082/. Your logs should get printed to the terminal.
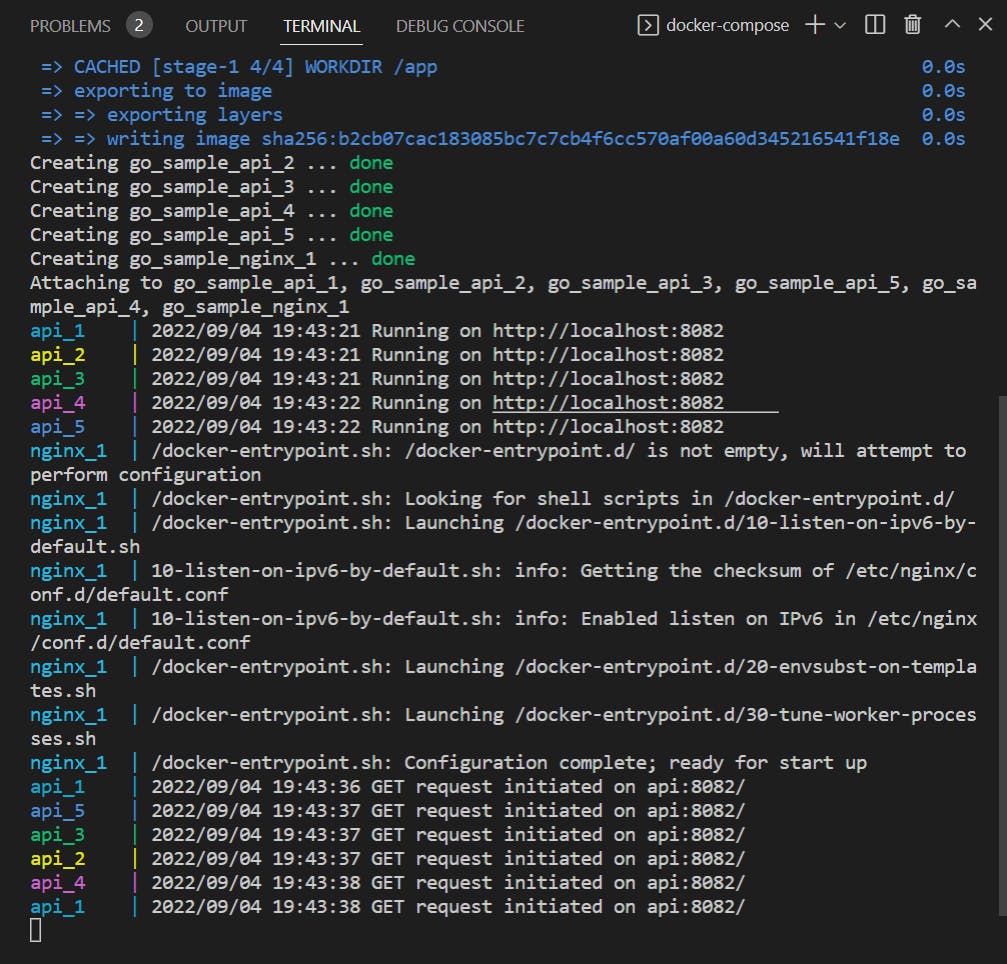
Hit refresh multiple times and you should see something similar to the below screenshot:

Observe that the "GET request initiated on api:8082/" reponses are returned from different servers.
Conclusion
Congratulations!🥳, you have successfully set up reverse proxying and load balancing on your API using Docker, Nginx, and Docker Compose.
Here's a link to the Github repository containing the complete codebase.
My next article might be on setting up load balancing with Nginx alone. If you're interested in that, a comment or a message via my social handles might serve as an encouragement.
Till then✌🏾

